
The Hardware
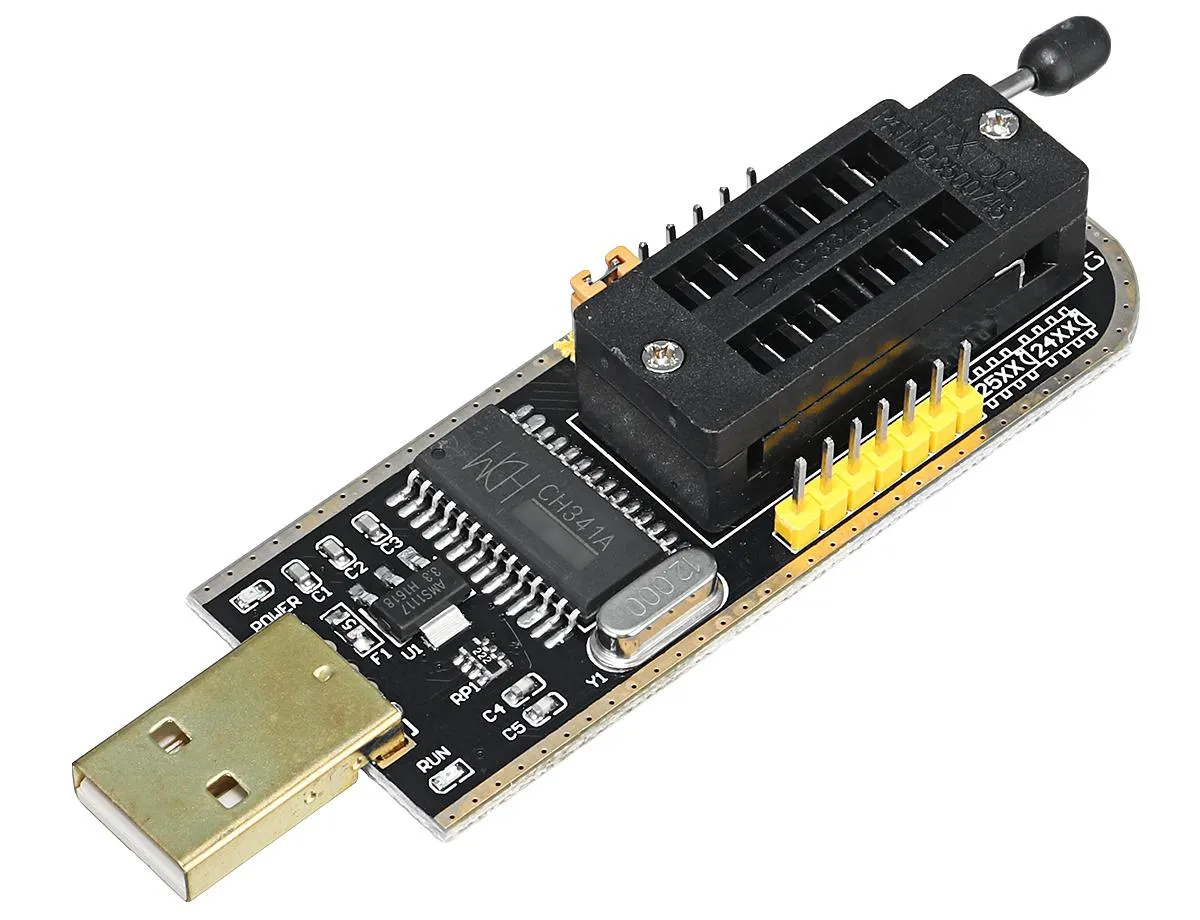
Both levels use the same small USB module, just with different things plugged into its socket. Level 1 uses a chip clip (see the clipping-on tips). For Level 2, a small adapter plugs into the socket and your minibadge plugs into that, so you don't have to fight a chip clip while writing data.
Driver Setup
The programmer runs in Chrome, Edge or Opera using WebUSB, which lets a web page talk to a USB device you pick. Firefox and Safari don't support it. Each operating system needs a slightly different one-time step:
Windows: install WinUSB with Zadig
Windows gives the CH341A a driver that a web page can't use. Swap it for WinUSB once per computer (the same fix as the logic analyzer's driver setup):
-
Plug in the CH341A
Leave the mode jumper where it came from the factory.
-
Open Zadig
Download it from zadig.akeo.ie. Choose Options → List All Devices, then pick the device whose USB ID is
1A86 5512. It may be called "USB UART-LPT" or "CH341A". Double-check the ID so you don't replace the driver of something else. -
Install WinUSB
Set the target driver to WinUSB and click Replace Driver (or Install Driver). Unplug the CH341A and plug it back in.
Linux: add a udev rule
No driver is needed, but by default only root may open the device. Let your user open it, then unplug and replug the programmer:
echo 'SUBSYSTEM=="usb", ATTR{idVendor}=="1a86", ATTR{idProduct}=="5512", MODE="0666"' \
  | sudo tee /etc/udev/rules.d/50-ch341a.rules
sudo udevadm control --reload-rules && sudo udevadm trigger
macOS
Nothing to install: Chrome or Edge can use the CH341A directly. If you installed WCH's serial-port driver at some point, it only affects the CH341 in serial mode and doesn't get in the way.
Plugging In a Chip
-
Unplug USB first
Put chips (or the clip or minibadge adapter) in and take them out with the programmer unpowered.
-
Use the 24XX positions
8-pin chips use half of the 16-pin socket. 24-series EEPROMs go in the four positions nearer the USB plug (the board's printed
25XX | 24XXmarking shows which half), with pin 1 (the dot or notch) toward the lever. Push the lever down to clamp it. -
Check the LED
Plug USB back in. The POWER LED next to the USB plug should be bright. Dim means backwards: unplug and fix it.
With a chip clip, the red wire goes to pin 1 (the dot on the chip). The programmer page has the same tips under "How to plug it in".
Using the Programmer
-
Start a session
Give your scratch space a name. Your table is saved in that browser as you go, so you can come back later the same day. Nothing is uploaded, and sessions are cleared daily: save a
.binof anything you want to keep. -
Connect
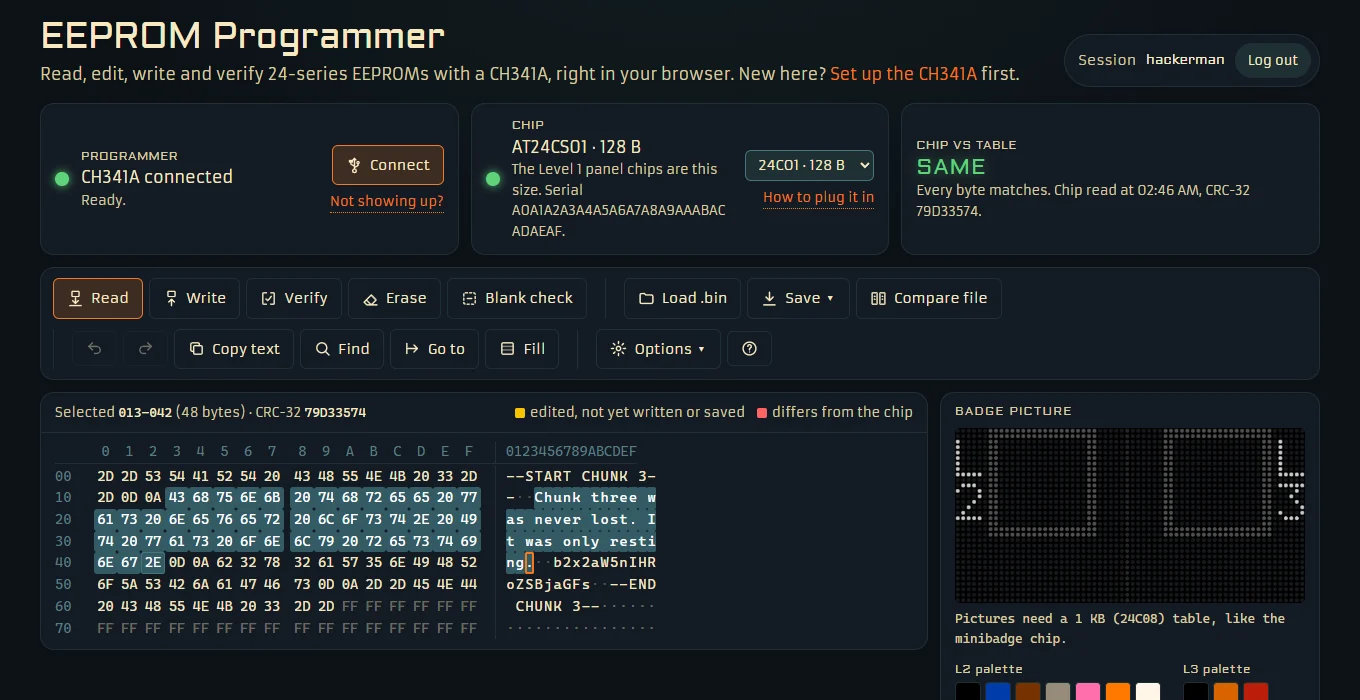
Click Connect and pick the CH341A in the browser's list. The browser always asks you to choose; after that, the page finds it by itself. The chip is detected as soon as it answers.
-
Read
Copies the whole chip into the table (128 bytes from a Level 1 chip, 1024 from your minibadge's) with the text alongside. Select text and copy it, or save it as a file.
-
Edit and Write (Level 2)
Type into the table, or load a
.binfile, then Write. Changed bytes stay highlighted until they're written or saved. Read your chip first: a good read means your solder joints are good before you write anything. -
Verify
Reads the chip back and compares it with the table: SAME or DIFFERENT, with every differing byte marked. Write verifies automatically unless you turn that off.
Desktop Alternatives
Prefer a desktop program? These work with the CH341A too. They may want a different driver than WinUSB, so follow their own setup instructions. Set the chip type to 24C01 for the Level 1 panel chips and 24C08 for your minibadge.
- IMSProg: graphical, Linux and Windows.
- AsProgrammer: graphical, Windows.
- ch341eeprom: command line, Linux and macOS.
A Note on Safety
This is about as low-risk as hardware hacking gets: you're reading and writing a 5V logic-level EEPROM, not touching mains voltage. The only real failure mode is a bad connection (bridged solder pins, a slipped chip clip) producing garbage data, which is exactly what reading first and verifying after are there to catch.